| |
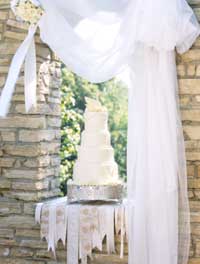
| Even without
serving the top tier, this statuesque cake
serves 100. |
|
|
| |
| Happily
Ever After |
| What You
Need: |
 |
Happily Ever After White
Champagne Wedding Cake |
|
|
- 2 12 x 1-inch round
baking pans
- 2 10 x 2-inch round
baking pans
- 2 8 x 2-inch round baking
pans
- 2 6 x 2-inch round baking
pans
- 10 white cake mixes (each
mix would fill a 13x9 pan)
- Champagne
- 2 1/2 recipes Royal Icing
(see below)
- 13 1/2-inch round wooden
board
- 10-, 8-, and 6-inch round
pieces of 1/4-inch-thick clear Plexiglas
- 1 recipe Hazelnut
Buttercream (see below)
- 6 recipes Creamy White
Frosting (see below)
- 6 24-ounce packages
fondant
- Large decorating bag
fitted with coupler, #18 and #21 star tips,
and #2 writing tip
- Edible pearl dragees
- 12 white plastic dowels
- Swan cake topper
|
|
Instructions:
-
Prepare
cake mixes one or two at a time,
according to package directions, substituting champagne for
the water. For bottom tier, divide 4 mixes between two
12-inch baking pans. For next tier, divide 2-1/2 mixes
between two 10-inch baking pans (use remaining batter for
cupcakes). For next tier, divide 2 mixes between two 8-inch
pans. For top tier, divide 1 mix between two 6-inch pans.
-
Bake
12- and 10-inch cakes in a 325 degree F oven for 55 to 65
minutes. Bake 8-inch cakes for 50 to 60 minutes and 6-inch
cakes for 45 to 55 minutes.
-
Cool,
wrap, and freeze each layer.
-
At least
two days before decorating the cake,
prepare the letters H, E, and A. Make a computer printout of
an Old English or script font in letters 1-1/4 inches tall.
Place waxed paper over the prints and pipe the letters onto
the waxed paper using Royal Icing and a #2 writing tip. Let
dry.
-
To
assemble tiers, stack 12-inch
cakes on the wooden board, lightly spreading Hazelnut
Buttercream between cakes. Repeat with remaining tiers,
stacking on Plexiglas pieces. Frost sides and tops of all
tiers with Creamy White Frosting. Apply fondant to top and
sides of each tier.
-
All
decorative piping is done with Royal Icing.
To decorate, divide the 12-inch tier into eight sections and
the 6-inch tier into four sections. Pipe a C-scroll in each
section using a #18 star tip. While the icing is still soft,
add pearl dragees. Decorate other layers with a shell border
and pearl dragees.
-
Insert
plastic dowels into the bottom three tiers
to support the stacks. Stack tiers on-site. Apply "Happily
Ever After" to the top three tiers with Royal Icing using
premade H, E, and A letters.
-
Pipe the
remaining letters with the writing
tip. Pipe a border at the base of each tier using Royal
Icing and a #21 star tip; add pearl dragees as desired.
Place the swan on top of the cake.
|
|

|


;)
;)
;)